Testing My Indoor Cyanotype Setup
Disclosure: This post contains some affiliate links. If you decide to make a purchase through my links, I will get a small commission at no cost to you. Any commissions directly support upkeep of this website and my print shop.
Introduction
I first became interested in making cyanotypes in April of 2020. I hyperfocused on learning everything I could, bought all of the supplies….and promptly did nothing for about a year. In the last few months, I got the urge to try again. It wasn’t until I tried my own indoor setup (not relying on UV from the sun), that it really started clicking for me. This post summarizes how I made my indoor cyanotype setup, the paper and chemicals I used, and an exposure time test I completed before embarking on making “real” cyanotype prints. Specifically, the indoor cyanotype setup that I will describe uses the Everbeam 365nm 50W UV LED Black Light and along with the Photographer’s Formulary Cyanotype Kit on Bergger COT 320 Paper.
My hope is that this information is helpful for individuals seeking to learn how to make cyanotype art prints and is informative to those that know little to nothing about this alternative photography process.
What is cyanotype?
Cyanotype is an alternative photographic process in which objects are placed on top of light-sensitized paper and are exposed to UV light, such as from the sun. Hence why cyanotype prints are also known as “sun prints”. During the UV exposure, the silhouette of the objects placed on the paper is captured. Cyanotype prints are known for their beautiful, Prussian blue color. The prints can also be toned with an agent such as tea or coffee.
The process was developed (see what I did there ;-)) in 1842 by English scientist and astronomer Sir John Herschel. While Sir John’s use of cyanotype was mainly to make copies of notes and diagrams, friend Anna Atkins saw it as a way to create botanical photographs. Anna Atkins was a botanist and photographer. She published the first book of cyanotypes in 1843.

Setting up a UV light box for cyanotypes
When I began my search for a UV light for cyanotype, I saw a few comments online that the cyanotype chemistry is most responsive at the 365 nm wavelength, while others stated they get along fine with 395 nm — it just takes longer to expose. I was able to find a paper by Turner et al. in which they tested various UV wavelengths and the impact on generating the Prussian blue color on light-sensitized paper. They saw a decreased response to the UV light as wavelength increased, especially once UV wavelength values were above about 360 nm.
With this knowledge, I selected the Everbeam 365nm 50W UV LED Black Light as my UV light source. This light conveniently comes with a bracket attached to the back which makes it easy to hang above your exposure area. Sparing no expense, I mounted the light inside a cardboard box. The cardboard box is 20 inches wide, 20 inches long, and 18 inches deep. I poked a couple of holes in the base of the box to string zip ties through. I looped the zip ties through the light’s bracket, so the light would hang down when I flipped the box over. Then, I cut off the flaps along the top of the box, so the box would sit flush on the floor. Lastly, I cut a flap 14 inches high and 13.5 inches wide on one side of the box. This became the “door” where I could put my paper in and keep it closed during the exposure.
In the finished box, the shortest distance between the UV light and my floor is just over 12 inches. This distance seems to work well for all paper sizes that fit within the constraints of the box. If I wanted to make larger cyanotype prints, I could increase the distance between the light and the floor (may affect exposure times), but I would also consider purchasing a stronger UV light such as the 100W Everbeam 365nm UV LED Black Light.
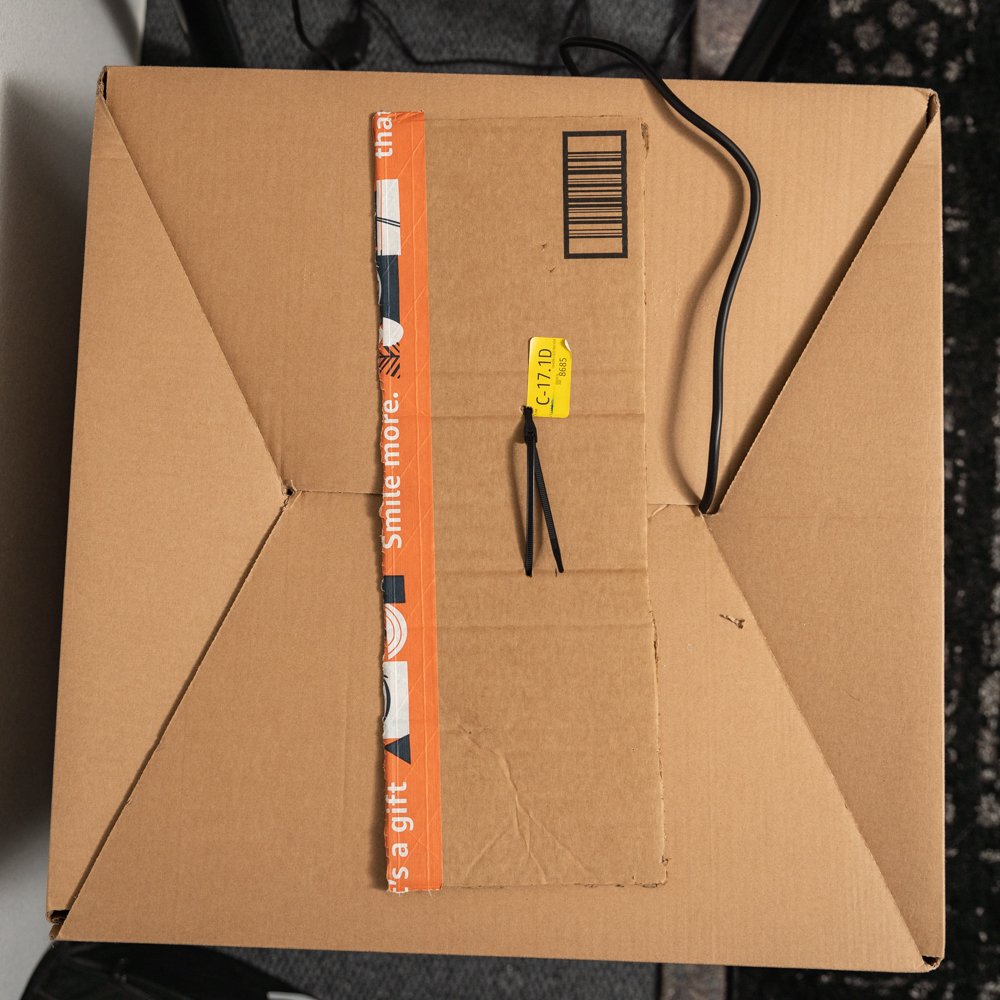
Top of the cardboard box


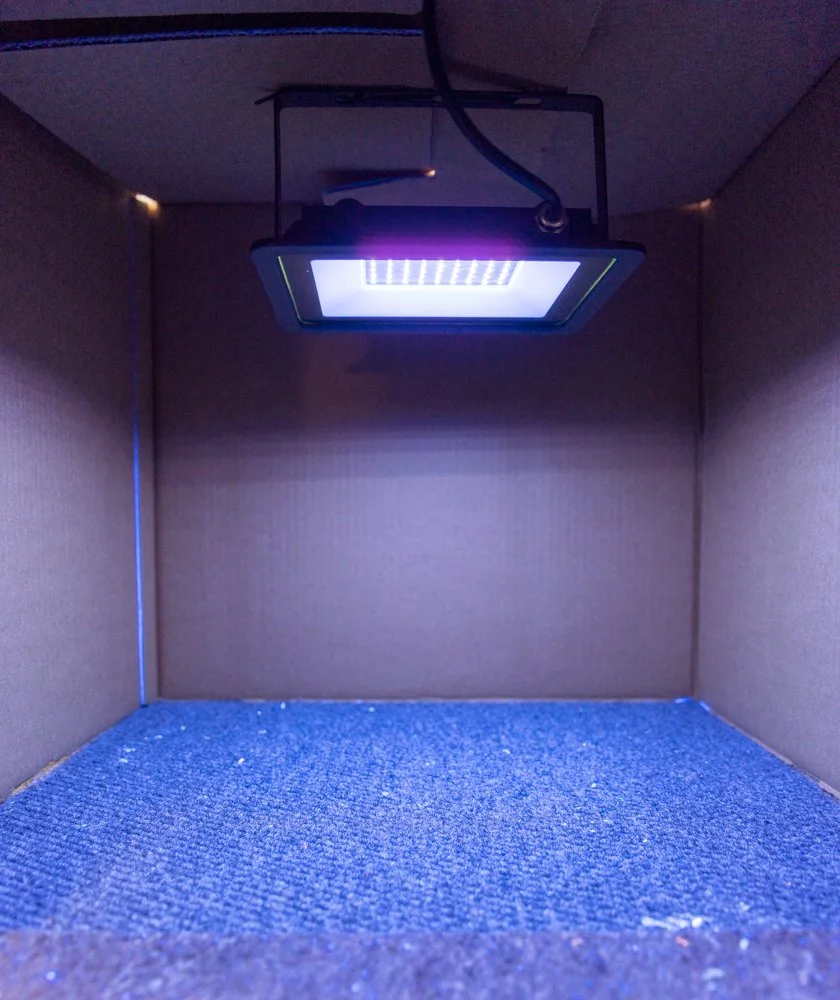
The UV light hangs down, via zip ties, from the box
Preparing the cyanotype paper
The next step was to prepare light-sensitized cyanotype paper. I used Bergger COT 320 paper and the Photographer’s Formulary Cyanotype Kit. Another paper option that I’ve tried with great results is the Hahnemühle Platinum Rag Fine Art Paper. There is also a cheaper cyanotype kit available by Jacquard. The primary components of the cyanotype chemical kit are: Solution A and Solution B (MSDS here). Solution A contains a ferric ammonium citrate mixture. Solution B contains a potassium ferricyanide mixture. The objective is to mix equal parts of Solution A and Solution B, paint it onto a piece of paper, and let it dry in the dark. It is ideal to mix the chemicals in a room with no natural light. You don’t want to prematurely expose the chemicals to any UV light. Also be sure to wear gloves (such as nitrile gloves) and use common sense when working with these chemicals :-).
I cut the 8x10 Bergger COT 320 in half so I had multiple 5x8 sheets. I mixed about 4 mL of Solution A and 4 mL of Solution B together in a small dish. A little goes a long way with this stuff. Then I took a 1 inch foam brush and painted a piece of the 5x8 paper with horizontal strokes. Then I painted the paper with vertical strokes. By the end, the paper had a very thin layer of the cyanotype solution and I moved onto the next piece of paper. I dried the sensitized pieces of paper on a shelf in the dark for at least 20 hours.
Cyanotype exposure time test
The exposure time needed for cyanotype is primarily dependent on the strength of the UV light source, the transparency of the objects you place on top of the paper, and your desired artistic outcome. The areas of the paper which are exposed to the UV light source (without objects covering them) will be lighter blue if the exposure time is shorter and darker blue if it is longer.
I tested cyanotype exposure times in 1 minute increments up to 20 minutes with and without plexiglass (1/8” thick acrylic). Plexiglass is helpful in situations where I need objects (such as leaves) to be completely flat on the paper. The plexiglass absorbs some UV light, thus it requires longer exposure times.
Washing & drying the exposed paper
After exposing the cyanotype paper, the paper looks a bit weird and if you’re new to the cyanotype process, you might be thinking you did it wrong.
I placed the piece of paper in a tray and rinsed it for about 5 minutes in lukewarm water. I emptied the water from the tray and added fresh water back in along with a little bit of hydrogen peroxide. I was not precise with the hydrogen peroxide, but if I had to guess, it was probably 2 or 3 tablespoons. The hydrogen peroxide deepens the blue color on the paper. I rocked the tray for less than a minute and then emptied the tray. For the third wash, I added fresh lukewarm water and rocked the tray for another minute or two. Then, I emptied the tray and took the paper to dry in the dark.
Performing the cyanotype exposure time test
Cyanotype exposure time test - results
NO plexiglass
Without the plexiglass, a nice, medium Prussian blue color starts to appear after about 8 minutes of exposure. The color gets darker with increasing exposure.
After exposure, before washing
After rinsing and rocking in water tray for 5 min.
Result after < 1 min. wash in water with a small amount of hydrogen peroxide. Numbers indicate how many minutes of exposure each rectangle had.
WITH plexiglass
When plexiglass was used, it took more than double the exposure time to get Prussian blue colors similar to what I saw when I did not use plexiglass.
After exposure, before washing

Result after 5 min. water wash and < 1 min. in water with hydrogen peroxide. Numbers indicate how many minutes of exposure each rectangle had.
Additional testing
Leaf skeleton
The exposure time results above gave me a place to start for my next cyanotype tests. It was clear that the plexiglass absorbed a lot of UV light, so any cyanotypes with plexiglass would need to have longer exposure times.
I had some magnolia leaf skeletons which I purchased here (Etsy link). I used these to perform another exposure time test with the plexiglass. I wanted to see how long it would take to develop a nice Prussian blue color and if I would lose any of the leaf skeleton detail with the longer exposure.
The image on the right shows 20 minute to 50 minute exposure blocks in 10 minute increments. It took around 40-50 minutes to start getting a nice deep blue color.
Leaves #1
I had a few leaves (not the best quality) that I collected a few months ago. I did a couple of tests to see how long of an exposure would be needed to get interior details to come through from the leaves. With this first test, I did a 60 minute exposure without plexiglass. After exposing (middle pic), I was excited to see some of the details in the maple leaf show up. But then I washed it…and they all fell away.

Before exposure - no plexiglass used
After 60 min. exposure, before washing
After washing and hydrogen peroxide solution
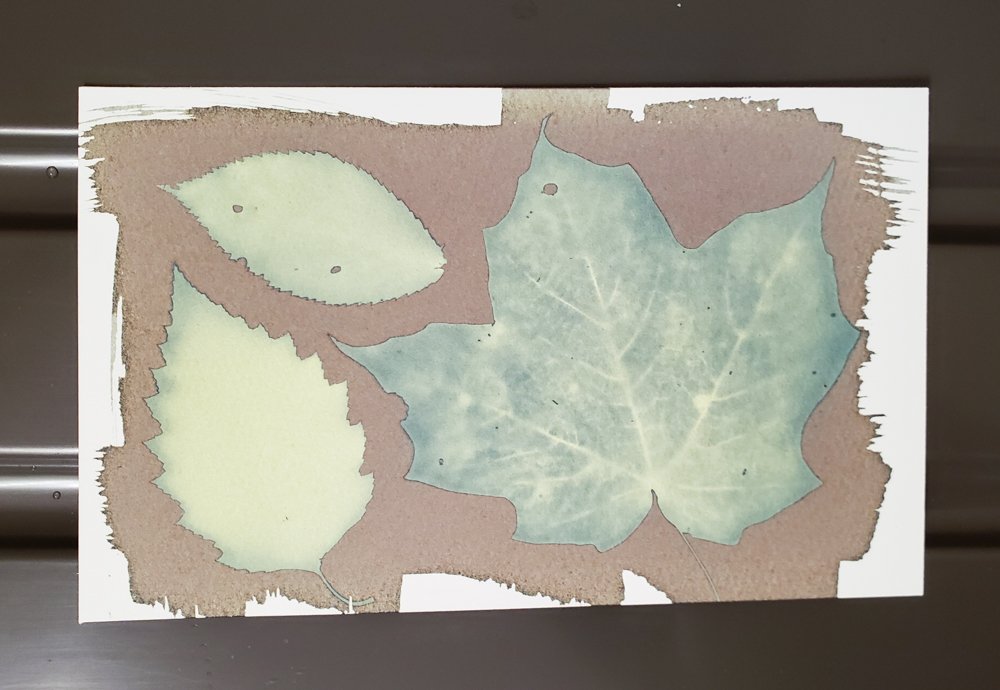
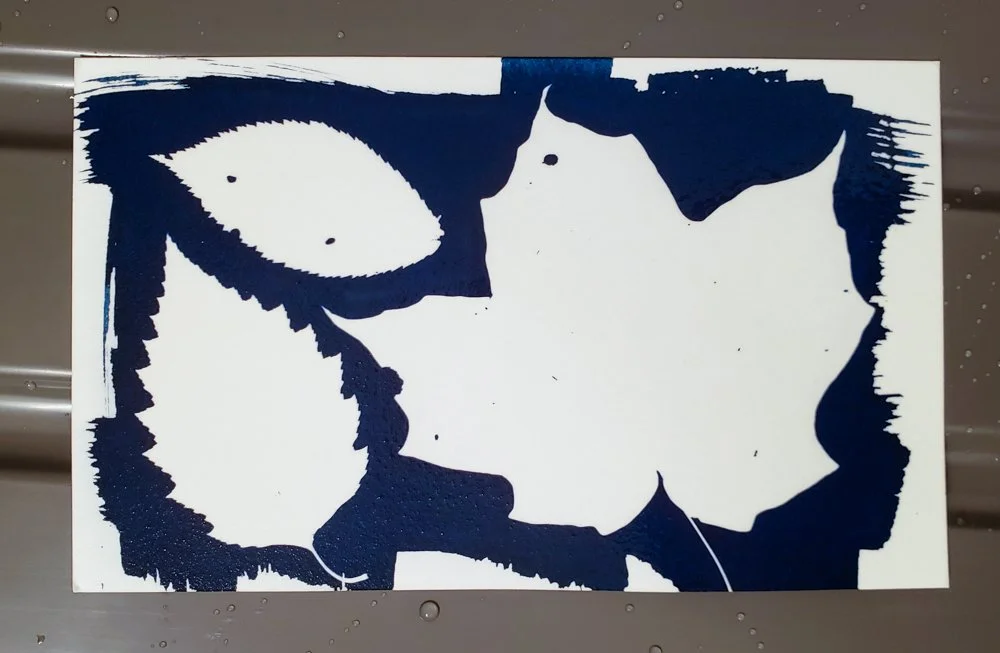
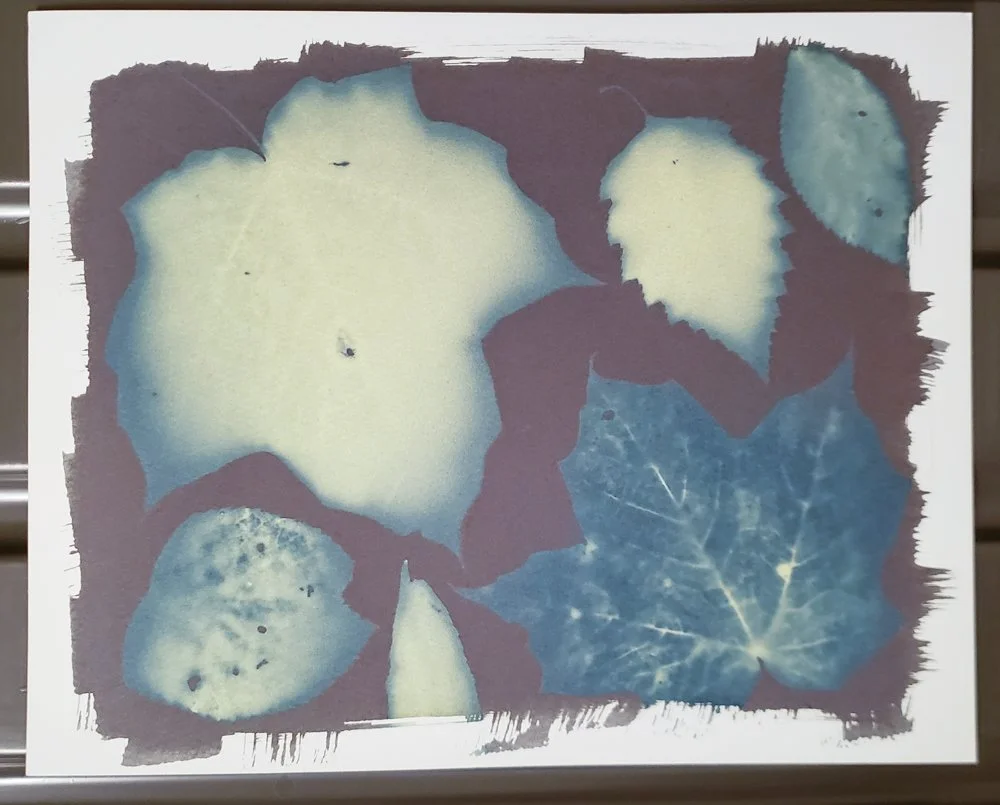
Leaves #2
After the 60 minute exposure, I decided to try a 5 hour exposure without plexiglass. I was excited again to see even more detail in that same maple leaf (lower right leaf). After washing it, a lot of the detail disappeared, but not all of it. One other noticeable feature of this exposure is the gradient of blue to white along the edges of some of the leaves. This is because not all of the leaves were perfectly flat on the paper — hence, the need for some type of glass to cover material like this.

Before exposure - no plexiglass used
After 5 hour exposure, before washing
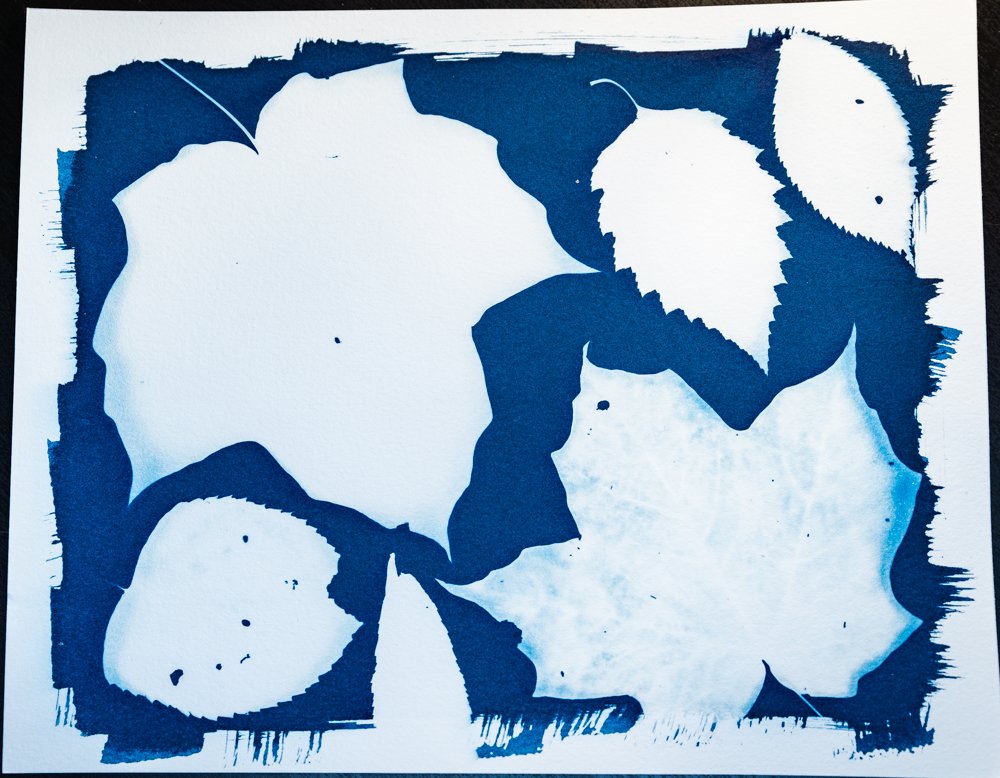
After washing and hydrogen peroxide solution
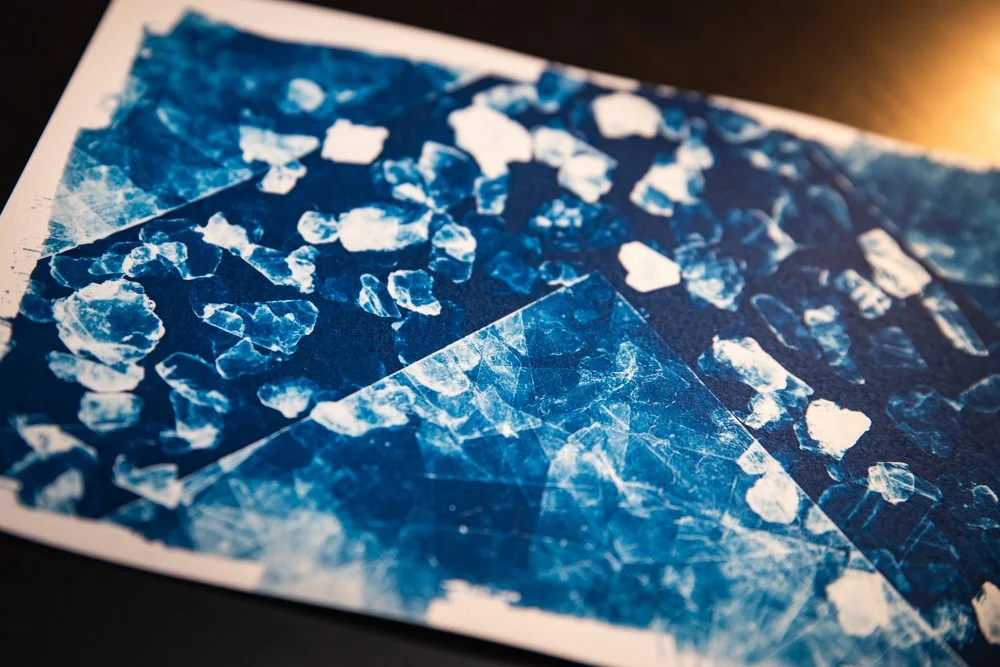
Icy Textures
My favorite so far has been playing around with icy looking patterns. Both of these are 18 minute exposures.
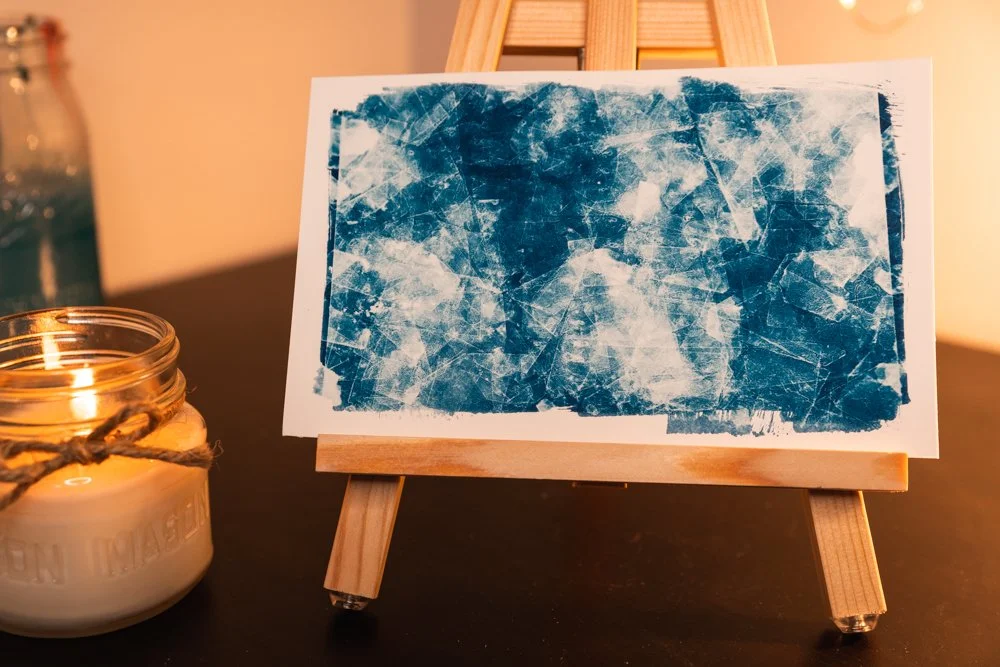
18 min. exposure, no plexiglass
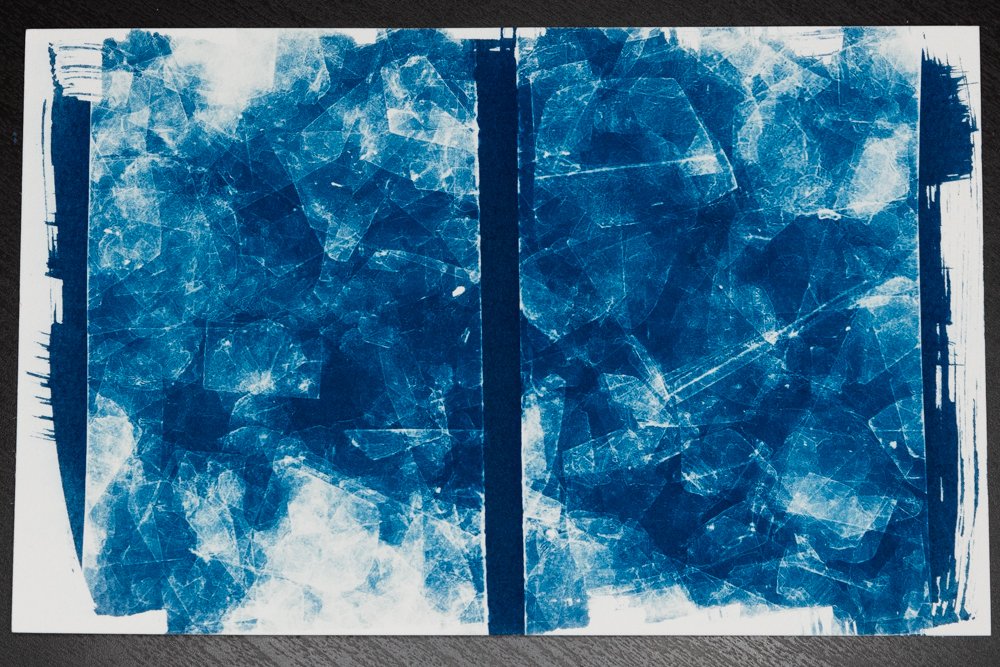
18 min. exposure, no plexiglass
I made the icy textures using different types of mica, which I purchased here:
Summary
Making an indoor cyanotype setup does not need to be expensive - you just need the UV light, a cardboard box, a packet of paper, a foam brush, and the cyanotype chemical kit
Performing exposure time tests will help you figure out how long each cyanotype exposure should be
Using a plexiglass cover significantly adds to the exposure time needed
There are SO many artistic possibilities with cyanotype
Thanks for reading!